People can prevent mold and humidity damage by keeping wooden jewelry boxes in a dry, cool space. Indoor humidity must stay between 40 and 50 percent. Bathrooms, kitchens, windows, and exterior walls collect damp air. Silica gel packets and a small hygrometer serve as the first line of defense. Only completely dry jewelry belongs inside a jewelry box. Regular airflow stops moisture buildup. Musty smells, discoloration, and fuzzy spots demand immediate action. These habits protect jewelry from tarnish. Tarnish ruins silver. Tarnish damages gold. Tarnish affects stones. Tarnish reduces value. Tarnish spreads quickly. Tarnish needs moisture. Tarnish loves damp conditions. Tarnish prevention starts early. Tarnish control requires discipline. Tarnish avoidance saves money. Προσαρμοσμένα κουτιά κοσμημάτων, συσκευασίες κοσμημάτων, και κατασκευαστής συσκευασιών κοσμημάτων products support storage. Οθόνη κοσμημάτων και Θήκη για κοσμήματα items also help. Cool, dry, and dark locations work best.
Why Wooden Jewelry Boxes Are Vulnerable to Moisture
Wood Acts Like a Sponge
How Wood Absorbs and Releases Moisture
Wood is hygroscopic. This material property means wood gains or loses water in response to RH. The surrounding air may contain more water vapor than the wood. The wood absorbs water. The air may contain less. The wood releases water. This exchange reaches Equilibrium Moisture Content (EMC). At that point, the wood stops changing.
Why Swelling, Warping, and Cracking Happen
Rising RH makes wood expand. Falling RH makes wood shrink. A 4% change in moisture content causes roughly a 1% change in dimension across the grain. Lengthwise changes stay minimal. This constant movement stresses the joints. Swelling occurs. Warping follows. Cracking develops. These cracks create entry points for fungus.
Mold Loves Damp, Dark, Stagnant Spaces
Why a Closed Box Is a Perfect Mold Environment
A closed jewelry box traps damp air. Poor ventilation allows stagnant air to settle. Wood, paper, leather, and fabric sit vulnerable inside. These materials feed fungal colonies in dark, damp environments.
Three key conditions for fungal growth converge inside a closed box:
| Condition | Fungal risk factor |
|---|---|
| RH | High RH and water vapor buildup allow fungal growth; keeping RH between 30% and 50% prevents it. |
| Airflow | Poor ventilation and stagnant air allow dampness to settle; spacing items apart and elevating them keeps airflow moving and prevents fungal growth. |
| At-risk materials | Wood, paper, leather, and fabric are vulnerable in dark, damp environments. |
Temperature also matters. Indoor temperatures between 68°F and 78°F protect the box. Vent or AC blasts create localized cooling and wood damage. Owners must position the box away from such drafts.
How Humidity Above 50 Percent Feeds Mold Growth
RH above 50% signals danger. Fungal spores germinate quickly at that threshold. RH between 40% and 55% keeps wood safe. Summer dehumidifiers and winter humidifiers maintain balance. Clean drip pans prevent mildew in the equipment itself.
Why Prevention Beats Repair
The Cost of Restoring a Moldy or Warped Box
Repairing a damaged box costs money. Professional restoration may exceed the box’s original value. Wood loses its finish. Joints loosen. The box becomes a liability rather than a storage solution.
How Damage Affects Your Jewelry and Your Health
Fungal spores settle on jewelry surfaces. Tarnish thrives in damp air. Tarnish dulls silver quickly. Tarnish spreads across gold. Tarnish damages stones. Tarnish reduces jewelry value. Tarnish makes cleaning costly. Tarnish forms through exposure to humidity and air. Tarnish also appears when excess moisture remains trapped. Tarnish prevention requires a dry environment. Tarnish prevention starts with the jewelry box itself. Porous jewelry items absorb contaminants permanently. Wooden jewelry boxes demand the same attention. These steps prevent mold and humidity damage. They protect health at the same time.
Control Humidity and Moisture Around Your Box
Controlling the air around a wooden jewelry box starts with a clear plan. The owner must manage moisture every day. A stable environment stops wood from swelling and keeps mold spores dormant. These efforts protect the box itself.
Target the Right Humidity Level
Why 40 to 50 Percent Is the Sweet Spot
Wood stays calm when the room sits in the 40 to 50 percent range. In this zone, the wood’s moisture content changes slowly. The box holds its shape. The finish remains intact. The lining stays dry. Metal surfaces face fewer chemical attacks. Tarnish forms when air and moisture interact with silver, copper, and gold alloys. Tarnish grows faster in unstable conditions. Tarnish appears as a dull film. Tarnish needs dampness to spread. A stable 40 to 50 percent range denies tarnish that dampness.
What Happens Below 40 and Above 50 Percent
Dropping below 40 percent forces water out of the wood. The wood dries, shrinks, and cracks. Loose joints follow. Cracks invite dust and fungal spores. Rising above 50 percent makes the wood absorb excess water. Mold colonies establish themselves. Tarnish accelerates inside the box. Tarnish dulls polished surfaces. Tarnish attacks fine details. Tarnish spreads from piece to piece. Tarnish becomes permanent if ignored. The owner should keep the room away from both extremes.
Measure Humidity With a Hygrometer
Where to Place a Small Hygrometer
A small hygrometer gives accurate readings only in the right spot. Place the sensor inside a compartment and close the lid for five minutes before reading. The sensor should stay one to two inches from the wood surface. It should not touch metal or fabric linings. A digital hygrometer shows the exact percentage at a glance. The reading reveals whether the box is safe for jewelry.
How Often to Check the Reading
Check the reading every morning. A quick glance takes seconds. Seasonal shifts require more attention. Record the numbers in a notebook. Consistent readings below 40 or above 50 mean the room needs action. This habit gives early warning before damage develops.
Use Dehumidifiers and Air Conditioning
Running a Dehumidifier in Humid Seasons
A dehumidifier removes water vapor from a whole room. It works best in basements and bedrooms. Run it during summer months. Keep the room near 45 percent. Let the machine run until the hygrometer reaches the target. Many units have a drain hose. The owner should empty the tank before it fills. Old units need clean coils and a dry drip pan. The machine protects jewelry by drying the air around the box.
Using AC to Keep Indoor Air Dry
Air conditioning also lowers airborne water. The cooling coil pulls water from the air. The system drains that water outdoors. AC works best when windows and doors stay closed. Keep the thermostat steady. Sudden temperature changes cause condensation on the box. AC prevents dampness without blasting cold air directly at the wood. Position the box away from the AC vent.
Desiccants add an extra layer of control.
| Τύπος | Action | How It Helps |
|---|---|---|
| Silica gel packets | Replace every few months | Pulls water from the air inside the box |
| Sulfur-absorbing strips | Replace every six to twelve months | Removes gases that dull metal |
| Activated charcoal sachets | Refresh or replace periodically | Works as a natural dehumidifier |
Choose wooden jewelry boxes with a smooth lacquer or sealant finish. Untreated wood absorbs water, while a sealed finish blocks it. Use oxidation-resistant felt or suede lining. Ensure the compartments have enough space for airflow. Wipe jewelry with a soft cloth before storage. These habits prevent mold and humidity damage before the box develops a musty odor.
Add Silica Gel Packets and Desiccants
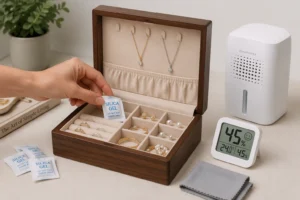
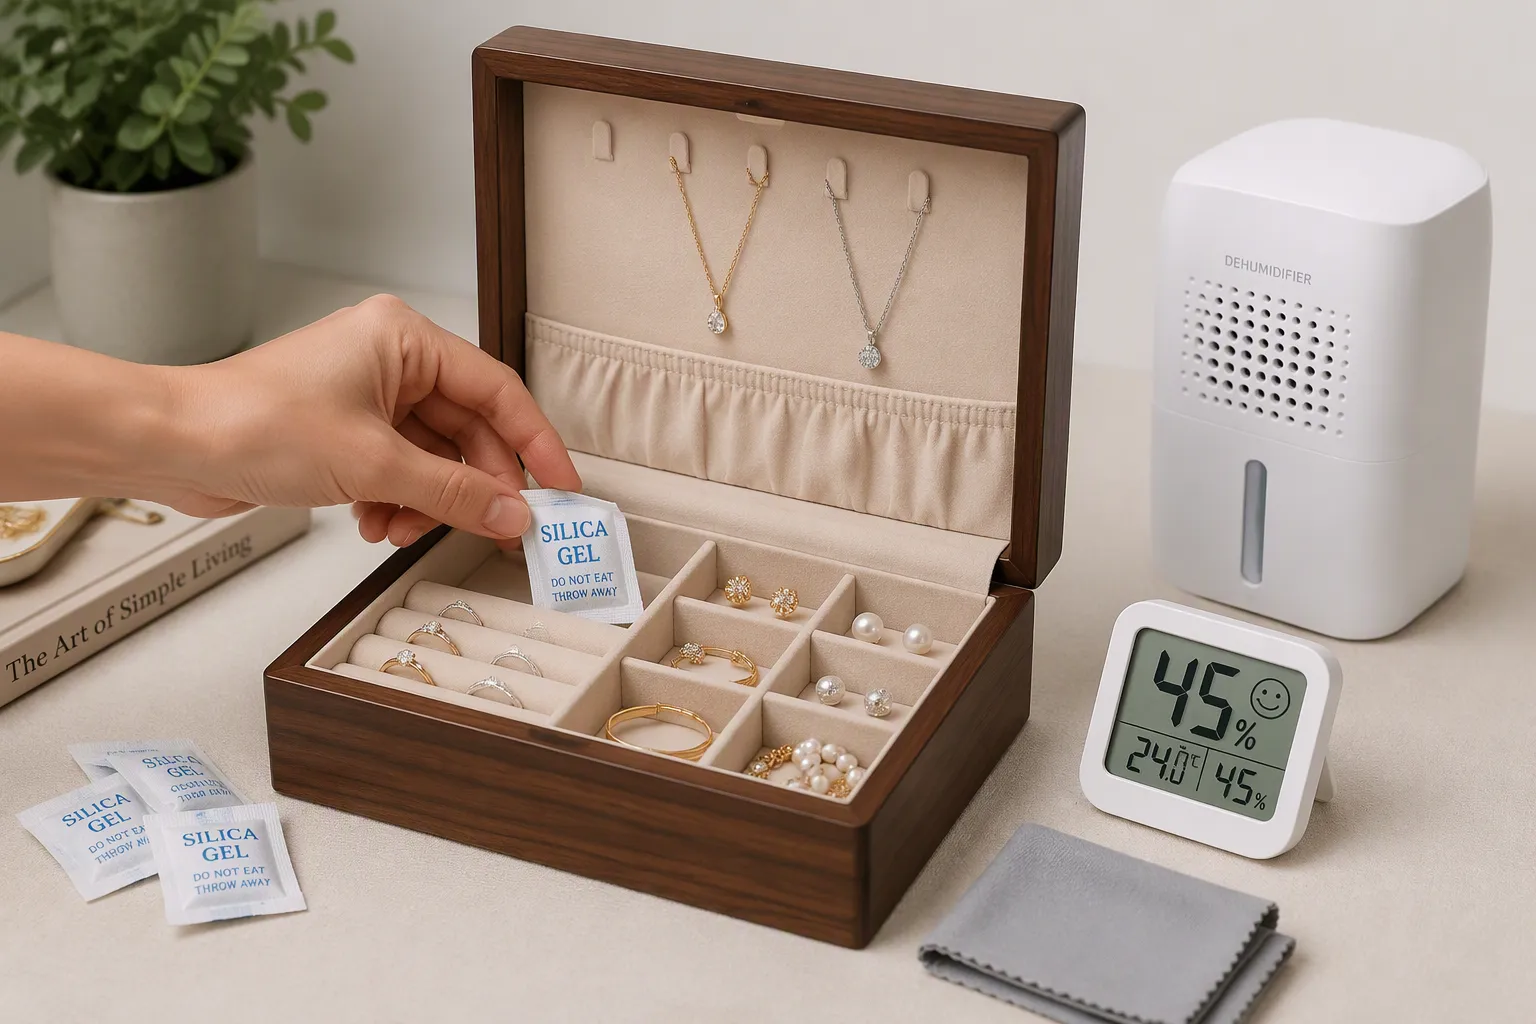
Silica gel packets pull excess water vapor from the confined air inside a wooden container. The packet acts as a backup defense when room conditions drift toward dampness.
Where to Tuck Packets Inside the Box
An average jewelry box holds a volume under 0.5 cubic feet. A normal climate requires one 10 g desiccant packet. A humid climate requires two packets, totaling 20 g. The table below summarizes the recommended dosage.
| Container | Volume | Normal climate | Humid climate |
|---|---|---|---|
| Jewelry/watch box | Under 0.5 cu ft | 10 g desiccant (≈1 packet) | 20 g desiccant (≈2 packets) |
An owner lifts the top tray and tucks one packet beneath it. A second packet slides into the hinge compartment. The packets belong in corners where air circulates freely. Loose jewelry should not rest directly on a packet. Velvet-lined trays hold rings and earrings. A packet protects those pieces by drawing moisture away.
How Often to Replace Them
Silica gel reaches saturation after weeks or months. Humid weather shortens its lifespan. Color-changing crystals show the current state. Blue crystals turn pink once full. Orange crystals turn dark green. An owner can refresh some packets in a warm oven. Others require disposal and replacement. Saturated packets no longer protect jewelry. A simple rule: replace packets when the season changes. Check every packet during the seasonal inspection. Replace saturated packets immediately.
Choose the Right Location
The physical placement of jewelry boxes determines how hard the desiccants must work. A box sitting in a dry room needs far less assistance. A dry location can prevent mold and humidity damage before the wood absorbs excess water.
Keep the Box Away From Bathrooms and Kitchens
Bathrooms generate steam from every shower. Steam saturates the surrounding air. A wooden box nearby collects that vapor. Condensation forms on the surface. Moisture seeps into the wood pores.
Kitchens release steam and grease vapor from boiling pots. Dishwashers emit damp heat during every cycle. These rooms create conditions that accelerate tarnish.
A bedroom offers the safest storage space in most homes. The table below ranks common locations.
| Home location | Safety recommendation |
|---|---|
| Bedroom | Driest room in the house; safest for jewelry storage |
| Hot attic, drafty cold closet, steamy bathroom | Avoid; extreme dampness and temperature can cause tarnishing |
Avoid Windows, Exterior Walls, and Basements
Windows collect condensation every cool morning. Radiators and heating vents dry out the air near windowsills. Exterior walls remain cooler than interior walls. Warm room air hits the cooler wall surface and releases its water vapor. A wooden box pressed against that wall absorbs the dampness.
Basements stay damp year-round. Ground moisture seeps through concrete floors. A basement storage room forces desiccants to work harder. Humid air allows tarnish to spread across metal surfaces.
The table below offers safe placement guidelines.
| Placement / condition | Safe guideline |
|---|---|
| Away from windows, radiators, bathrooms | Avoid heat sources and dampness |
| RH 40–50% | Preferred safe range |
| Temperature 68–72°F | Recommended stable temperature |
Choose an interior wall that never sees direct sunlight. Keep the box away from air vents. Stable temperatures keep tarnish at bay. Lingering dampness feeds tarnish. Silver dulls within days when tarnish takes hold. Gold and copper fall victim to tarnish. Gemstones lose their luster under tarnish. Fighting tarnish during cleaning is frustrating. A consistent environment prevents tarnish from ever starting. The owner who follows these habits safeguards every piece of jewelry they own. A stable placement keeps jewelry bright and safe for decades.
Apply Protective Barriers for Moisture Control
Protective barriers form a second line of defense for wooden jewelry boxes. A sealed surface blocks water vapor. Protective liners shield stored pieces. Natural repellents discourage mold. Together, these layers reduce stress on the wood and keep the interior stable. This approach simplifies the care routine.
Seal the Wood Surface
Using Wax and Wood Conditioner
Beeswax-based products provide a superior seal. Mikutowski Woodworking’s research indicates this method offers 40% better protection against environmental wear than synthetic options. A thin coat prevents drying while allowing the wood to exchange air. Application once or twice a year works well. Rub the wax into the grain with a soft cloth. Buff the surface afterward. Avoid silicone products.
“Silicone creates a false shine that actually accelerates wood degradation by trapping moisture against the surface.” — Jewelry Box Conservation Guide 2024
When Varnish or Polyurethane Makes Sense
Varnish or polyurethane suits antique or raw wooden boxes. These finishes form a hard film. The film blocks liquid water and airborne water vapor. This option helps in humid climates. It changes the wood’s appearance. It also requires full curing before anyone places jewelry inside. A professional can advise which finish fits the box. This decision matters for long-term protection.
Add Moisture-Resistant Liners
Felt, Cork, and Cedar Options
Liners separate pieces from raw wood. Felt adds cushioning. Cork resists dampness. Cedar repels moths and absorbs excess humidity. A quality liner reduces tarnish risk. The table below compares common protective products.
| Protective Finish / Liner | Mechanism of Action | Application Frequency |
|---|---|---|
| Wood oil or wax | Seals the wood, preventing drying and damage from external elements | Once or twice a year |
| Sulfur-absorbing strips | Absorbs sulfur and water vapor, the primary source of dulling | Place inside box as needed |
| Silica gel packets | Keeps enclosed air dry | Place a few packs inside the box |
| Cotton cloth | Shields pieces from air and dampness | Wrap jewelry before storing |
How to Install Liners Without Trapping Dampness
Liners must breathe. Glue only the edges of felt or cork. Leave the center loose. This gap allows airflow behind the liner. Cedar planks may lie flat on the compartment floor. Do not use adhesive across the entire sheet. Trapped air creates a damp pocket. A damp pocket invites mold. Reinstall liners during the seasonal inspection.
Use Anti-Mold Strips and Natural Repellents
Cedar, Charcoal, and Camphor Products
Cedar blocks and chips release natural oils that repel insects and fungus. Activated charcoal absorbs odors and water vapor. Camphor products add a strong scent and discourage mold. These natural options work best alongside a sealed finish. They do not replace desiccants.
Choosing Non-Toxic Treatments for Jewelry Storage
Many commercial anti-mold sprays contain harsh chemicals. Those chemicals can damage metal and stones. Choose non-toxic treatments labeled safe for wooden boxes. Read the ingredient list. Avoid sprays that contain bleach, ammonia, or sulfur. Natural products, such as cedar oil, offer protection without leaving harmful residue. Test any treatment on an inconspicuous area first. This careful approach preserves both the box and the items inside.
Pick Products Safe for Jewelry
A wooden jewelry box needs protection. The chosen finish must also safeguard its contents. A product can seal wood perfectly. That same product can harm jewelry. Owners must evaluate treatments before application. This process prevents costly damage. Moisture control begins with selecting the right wax or finish. A safe product preserves the box. A harsh product ruins the gems and metals inside.
Avoiding Harsh Chemicals Near Metals and Stones
Metal surfaces react quickly to chemical residues. Silver tarnishes when sulfur touches it. Gold alloys lose their shine with ammonia. Stones face different threats. Pearls, opals, and turquoise absorb chemicals. Their porous surfaces trap liquids. A strong cleaner can etch a stone permanently. Harsh sprays release airborne droplets. These droplets land on jewelry surfaces. The damage may appear weeks later.
Safe products avoid bleach, ammonia, and synthetic solvents. Labels often say “all-purpose” or “heavy-duty.” These terms signal danger. A product intended for floors does not belong near jewelry. A gentle wood soap or natural wax offers a safer choice. Owners should test any treatment on an unseen area first. They should wait 48 hours. They should check for discoloration. This method reveals potential harm.
Reading Labels Before You Treat the Wood
The label serves as the first warning. Manufacturers list active ingredients. Owners should scan for common dangers. Acids, alcohols, and petroleum distillates require caution. Ingredients ending in “-ide” often indicate chlorine compounds. Unfamiliar chemical names deserve research.
A clear label provides dosage instructions. It also states suitable surfaces. A wood treatment must say “safe for finished wood.” Some products contain silicone. Silicone blocks future treatments. It leaves a greasy film. That film traps moisture. Trapped moisture damages the box interior.
Owners should choose a product with simple ingredients. Natural oils, beeswax, and carnauba wax work well. These options protect wood without toxic residue. They also support jewelry storage. A jewelry box treated with natural wax stays safe for daily use.
The best practice involves storing dry pieces first. Owners should apply treatments only to the exterior. Interior liners rarely need chemical treatments. Owners should keep products away from hinges and clasps. A dry cloth removes excess wax. This routine keeps the box stable. The box remains a haven for jewelry. Safe choices preserve both the wood and the valuables inside.
Adopt Moisture-Smart Daily Habits
Daily habits determine whether a wooden jewelry box stays dry or becomes a breeding ground for mold. Small actions add up over time. A person who follows a consistent routine protects both the box and its contents. These habits require only a few minutes each day. They prevent costly damage and extend the life of every stored piece.
Store Only Completely Dry Jewelry
Why Damp Jewelry Feeds Mold
Wooden jewelry boxes are hygroscopic. They readily absorb and retain moisture from their surroundings. Fungal spores need stagnant air and elevated humidity to germinate and grow. Mold spores require relative humidity above 60 percent to thrive. A person who places damp jewelry inside the box introduces a hidden threat. The residual moisture on the jewelry evaporates into the enclosed space. This process raises the internal humidity of the wooden box. The result is a damp, stagnant micro-environment. Mold finds exactly what it needs to grow and reproduce.
Jewelry boxes typically contain wood, leather, flocking, fabric, paper, and water-based adhesives. These materials hold fibers, oils, and other organic nutrients. Mold feeds on these substances. Common mold species found on jewelry boxes include Aspergillus niger, Aspergillus flavus, and Aspergillus oryzae. These organisms cause odors, staining, and permanent damage. Even small amounts of moisture can wreak havoc on jewelry. A single damp earring can start a colony that spreads throughout the entire box.
Drying Jewelry Before It Goes Back in the Box
A person should dry every piece of jewelry completely before storage. A soft cloth removes surface moisture after daily wear. The cloth should absorb sweat, lotion, and skin oils. A dry cloth works better than a damp one. The owner should let each piece air dry for at least thirty minutes. Thick chains and intricate settings may need more time. A small fan speeds the process. The jewelry should never feel cool or clammy to the touch. That sensation signals remaining moisture.
A simple test helps confirm dryness. The owner presses a piece against a dry tissue. The tissue should stay dry. Any wet spot means the jewelry needs more drying time. Only then does the piece return to its compartment. This habit protects the box from internal dampness. It also prevents tarnish from forming on metal surfaces. Silver and gold stay bright when they remain dry.
Keep Damp Items Away
Never Store Wet Cloths or Towels Nearby
A polishing cloth belongs near the jewelry box. That cloth must stay dry. A damp cloth releases water vapor into the surrounding air. The wooden box absorbs that vapor through its surface. The interior humidity rises. Mold spores activate. A person should store polishing cloths in a separate drawer. The drawer should sit away from the jewelry box. A sealed plastic container works well for cloth storage. The container keeps moisture locked inside and away from the wood.
Towels and bathrobes create similar problems. A bathroom towel draped over a chair near the jewelry box releases moisture all day. The air around the box stays humid. The wood absorbs that moisture slowly. Damage develops over weeks and months. The owner should keep all damp fabrics at least six feet from the box. This distance allows air to disperse the moisture before it reaches the wood.
Handling Sweaty Items After Workouts
Sweat contains water, salt, and body oils. These substances damage jewelry and feed mold. A person who wears rings or bracelets during exercise should remove them immediately afterward. The pieces need a thorough wipe with a dry cloth. The cloth should absorb all sweat residue. The jewelry then air dries for at least one hour. Only after complete drying does it return to the box.
Sweaty items placed directly into a jewelry box create a perfect mold environment. The enclosed space traps moisture. The salt and oils provide additional nutrients for fungal growth. The box interior becomes a breeding ground within days. A person who follows this rule protects both the jewelry and the box. The extra minute of drying time prevents hours of cleaning later.
Let the Box Breathe
Opening the Lid for a Few Minutes Weekly
A closed jewelry box traps air inside. That air becomes stagnant over time. Moisture accumulates in the compartments. Mold spores settle on surfaces and wait for the right conditions. A simple habit disrupts this process. The owner opens the lid for a few minutes every week. Fresh air enters the box. Stale, damp air escapes. This passive air exchange keeps the interior dry.
The best time for this habit is during a weekly cleaning routine. The owner opens the box and inspects the contents. Jewelry pieces get a quick check for tarnish or dampness. The lid stays open for five to ten minutes. A small fan can speed air exchange in humid weather. The owner then closes the lid and returns the box to its shelf. This weekly ritual takes almost no effort. It prevents moisture buildup before problems start.
Avoiding Sealed Plastic Bags Around the Box
Some people store their jewelry boxes inside plastic bags. They believe the plastic protects the wood from humidity. This practice causes more harm than good. Plastic traps moisture inside the bag. The wood releases water vapor into the enclosed space. That vapor cannot escape. The relative humidity inside the bag rises quickly. Mold spores germinate. The box develops a musty smell within weeks.
A breathable cotton pillowcase offers a better option. The fabric allows air circulation while blocking dust. The owner can also leave the box uncovered on a shelf. A dry, well-ventilated room provides the best protection. The box needs airflow on all sides. A sealed plastic bag denies that airflow. A person who avoids plastic bags prevents mold and humidity damage before it starts.
Wipe and Inspect Often
Weekly cleaning forms the backbone of a dry storage routine. The owner who wipes and inspects the box catches small problems before they become permanent damage. Fine jewelry deserves this level of attention. This practice takes minutes and rewards the owner with decades of use.
Wiping the Exterior With a Dry Soft Cloth
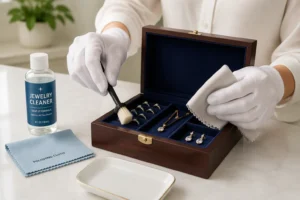
A dry microfiber cloth is the best tool for this task. The owner wipes the entire outside of the box once a week. They move the cloth in straight lines along the wood grain. They use light pressure. This action removes dust, skin oils, and airborne particles.
A dry cloth never leaves moisture on the surface. A damp cloth forces water into the wood pores. This moisture can swell the joints and dull the finish. A consistent wipe-down keeps the finish intact. It also gives the owner a chance to feel for rough spots or loose trim.
This habit protects the jewelry kept inside the box. Catching these changes early prevents the wood from warping. The owner also notices when the wood looks pale or cloudy. Those signs signal the need for a fresh coat of wax.
Checking Corners, Linings, and Hinges
Corners, linings, and hinges show the earliest signs of mold. Dust settles in these hidden areas. The owner checks every corner during the weekly wipe. They look for black flecks, white fuzz, or a musty odor. They run a fingertip along the seams to feel for dampness.
Linings trap water because their fibers hold onto vapor. The owner lifts the tray and examines its underside. They check the glue lines where felt meets wood. Any loosened edge should dry completely before the owner re-glues it. A damp lining will contaminate any jewelry that sits on it.
Hinges deserve the same attention. Metal hinges collect condensation when the air changes quickly. The owner opens the lid slowly and listens for squeaks. They wipe the hinge pins and edges with the dry cloth. Rust specks on a hinge warn of high humidity. The owner then checks the room hygrometer and adjusts the environment.
This five-minute routine preserves the entire box. A clean outer shell protects the jewelry and the craftsmanship. The owner who inspects weekly keeps their jewelry storage safe for years. The habit prevents mold before it ever begins.
Remove Existing Mold Without Damaging the Wood
Mold removal requires patience and care. A wooden jewelry box holds delicate finishes and fragile linings. Harsh scrubbing destroys the wood grain. Aggressive chemicals stain the interior. The owner must follow a careful process to eliminate mold without causing further damage.
Safety Comes First
Wearing a Mask and Gloves
Mold spores pose health risks when disturbed. A person should wear an N95 mask before opening a contaminated box. The mask filters airborne spores and prevents inhalation. Disposable gloves protect the skin from direct contact with mold colonies. Gloves also prevent the transfer of oils and dirt to clean wood surfaces. The owner should dispose of gloves after cleaning.
Working in a Well-Ventilated Space
Fresh air disperses spores and chemical vapors. The owner should work near an open window or outdoors. A fan helps move contaminated air away from the work area. A small workspace concentrates spores in the breathing zone. Good ventilation reduces exposure and speeds drying time.
Clear and Dry the Box
Removing All Jewelry and Liners
The owner must empty the box completely before cleaning. This process protects delicate pieces and preserves the box structure.
- Remove all jewelry first and place each piece in a temporary safe container.
- Photograph the box layout before taking anything apart so it can be reassembled correctly.
- Gently lift out removable trays and cushions.
- Detach and separate any linings that can be removed.
- Identify delicate parts such as springs or hinges and handle them with extra care.
This method supports safe removal while helping preserve the box’s structure.
Wiping Visible Mold With a Microfiber Cloth
A dry microfiber cloth removes surface mold without spreading spores. The owner should wipe gently along the wood grain. Pressing too hard pushes spores into the pores. The cloth should go into a sealed bag immediately after use. Visible mold on jewelry requires separate treatment.
Clean With Gentle Solutions
Using Diluted Rubbing Alcohol
Isopropyl alcohol kills mold spores on contact. The owner should mix one part alcohol with one part water. A cloth dampened with this solution wipes down affected areas. Alcohol evaporates quickly and leaves no residue. This solution works well on finished wood surfaces.
Using White Vinegar Safely
White vinegar offers a natural alternative for mold removal. Its mild acidity breaks down fungal growth. The owner should apply undiluted vinegar with a cloth. The surface needs a thorough wipe afterward with a clean, damp cloth. Vinegar smell fades as the wood dries. This method adds moisture to the wood, so the owner must dry the box completely afterward.
Dry, Sand, and Re-Finish
Drying the Box Completely
Moisture removal demands patience after cleaning. The owner must dry the wooden box for at least 24 hours. A warm, well-ventilated room speeds this process. Direct sunlight causes warping and fading. A small fan circulates air around the box surfaces. The owner rotates the box every few hours. This action exposes all sides to fresh air. Silica gel packets placed nearby absorb lingering dampness. The box should feel completely dry to the touch. Any cool sensation signals remaining moisture. The owner waits another day if needed. Rushing this step traps water inside the wood grain. Trapped water feeds new mold colonies within weeks. Jewelry stored in a damp box develops tarnish quickly. A dry box protects every piece of jewelry inside.
Light Sanding and Reapplying Protective Finish
Light sanding removes surface mold stains and smooths rough patches. The owner uses fine-grit sandpaper rated 220 or higher. Coarse grit scratches the wood and creates deeper problems. The owner sands with the grain using light pressure. A few passes usually suffice for minor damage. The owner wipes away dust with a dry microfiber cloth. This step prepares the surface for a new finish.
A protective finish seals the wood against future moisture. Beeswax or carnauba wax works well for most boxes. The owner applies a thin coat with a soft cloth. Circular motions push the wax into the grain. The owner waits 15 minutes for the wax to set. A clean cloth buffs the surface to a soft shine. Varnish or polyurethane suits heavily damaged boxes. These finishes require 24 hours of curing time. The owner keeps jewelry away from the box during curing. Fumes can damage delicate stones and metals. A properly sealed box resists humidity for months. The owner repeats this treatment every few months. This routine keeps the jewelry box stable and safe.
Build a Long-Term Routine to Prevent Mold and Humidity Damage
A consistent routine can prevent mold and humidity damage before problems begin. An attentive owner protects the wooden box and every valuable piece of jewelry inside. Three habits form the foundation: seasonal inspection, desiccant refresh, and year-round monitoring. Wooden jewelry boxes respond to shifts in the surrounding air. Each habit takes minutes. Each habit prevents costly repairs. A yearly schedule keeps the storage space stable.
Inspect Seasonally
Checking the Box at Every Season Change
Seasons alter the environment around any wooden storage box. Spring brings heavy rain. Summer adds heat and damp air. Autumn introduces cool nights. Winter creates dry indoor conditions. The owner should inspect the box four times per year. Each inspection takes about fifteen minutes. The owner examines the wood surface for cloudiness. They open every lid and drawer. They check the corners for dust. They look beneath trays and linings. A box surviving a humid summer may need a different location in winter.
Watching for Early Warning Signs
Early warning signs appear before visible damage becomes obvious. Musty smells demand immediate attention. Discoloration on the wood finish signals a breach in the seal. White fuzz in the corners indicates active mold growth. Warped joints or loose hinges point to swelling wood. Metal pieces inside the box show tarnish faster than the wood itself. Dampness on felt or velvet warns of trapped moisture. Each sign demands a quick response. Stored jewelry suffers alongside the damaged box.
Refresh Desiccants and Treatments
Replacing Silica Gel Packets on Schedule
The owner should replace silica gel packets when the seasons change. The same quarterly rhythm works for humid and dry climates. A packet feels hard when saturated. Color-changing crystals confirm the condition. The owner places fresh packets in every compartment. One packet sits beneath the top tray. A second packet stays near the hinge compartment. This small investment protects the box and the jewelry it holds.
Re-Treating the Wood Every Few Months
Wood treatments need renewal to stay effective. Beeswax and wood conditioner wear away with everyday handling. The owner applies a fresh coat every three to four months. This routine matches the seasonal inspection schedule. A thin layer of wax seals the wood surface and blocks external water vapor. Application takes fewer than ten minutes. The owner rubs wax into the grain with a soft cloth. Untreated wood absorbs dampness quickly and invites fungal growth. A protected surface keeps fine jewelry safe for generations.
Monitor Humidity Year-Round
Keeping a Hygrometer Inside or Near the Box
A hygrometer provides constant feedback on the storage environment. The owner places one small digital unit inside a compartment or directly beside the box. A reading between 40 and 50 percent protects the wood. Readings above 55 percent trigger an immediate response. The owner checks the hygrometer each morning. This habit gives early warning before mold gains a foothold.
Adjusting Your Routine for Humid Months
Summer months demand extra attention. The owner shifts their routine when outdoor conditions turn damp. A dehumidifier may run daily in the storage room. The owner opens the lid more frequently during humid weeks. They may add an extra desiccant sachet to each compartment. These adjustments prevent the wood from absorbing excess water. Jewelry remains bright and dry through the worst weather. Consistent monitoring creates a safe home for every piece.
Keep a Simple Maintenance Checklist
A maintenance checklist organizes efforts to protect the wooden box. This routine keeps humidity damage away. It also ensures every piece of jewelry remains safe. The owner follows simple tasks each week. The owner performs deeper checks each month. This structure prevents mold before it starts. The checklist also records past treatments. A written log shows when the owner replaced desiccants or applied wax. These notes guide future care.
Weekly Airflow and Wipe-Down
Weekly tasks take ten minutes. The owner opens the lid and lets fresh air move through the compartments. This action releases trapped moisture. The lid should remain open for at least five minutes. A small fan can accelerate air exchange during humid weather. The owner wipes the exterior with a dry microfiber cloth. The cloth removes dust and skin oils. The owner inspects corners and linings for white fuzz or dark spots. The owner checks the hygrometer reading. A number above 50 percent signals a need for action.
- Open the lid for five minutes to allow air exchange.
- Wipe all outer surfaces with a dry cloth.
- Inspect hinges, corners, and tray undersides.
- Check the hygrometer and replace any saturated desiccant packet.
- Return only completely dry jewelry to its compartment.
This weekly habit protects every piece of jewelry from tarnish and dampness. Catching problems early prevents permanent damage.
Monthly and Seasonal Tasks
Monthly tasks address deeper concerns. The owner examines the wood finish for cloudiness or cracks. The owner feels inside compartments for dampness. A musty odor demands immediate cleaning. The owner also rotates the position of stored jewelry. This movement prevents pressure marks on the liner.
Seasonal tasks occur four times each year. The owner replaces silica gel packets on this schedule. The owner applies a fresh coat of beeswax or wood conditioner. The owner re-treats the wood after every quarter. The owner also moves the box if the room conditions changed. Seasonal changes affect the wood differently. Spring rain raises humidity. Summer heat accelerates moisture evaporation. Fall and winter introduce dry indoor air. A humid summer may require a dehumidifier near the storage area.
- Refresh all desiccant packets.
- Apply a thin wax layer to the exterior.
- Compare the hygrometer reading with seasonal goals.
- Examine the box for warping or loose joints.
- Inspect each jewelry piece for early tarnish.
These monthly and seasonal checks maintain a stable environment. A consistent routine extends the life of the jewelry box. The owner who follows this checklist prevents mold and humidity damage for decades. That diligence preserves the wood’s finish and the metal’s shine.
How to Store Jewelry to Prevent Tarnish and Mold
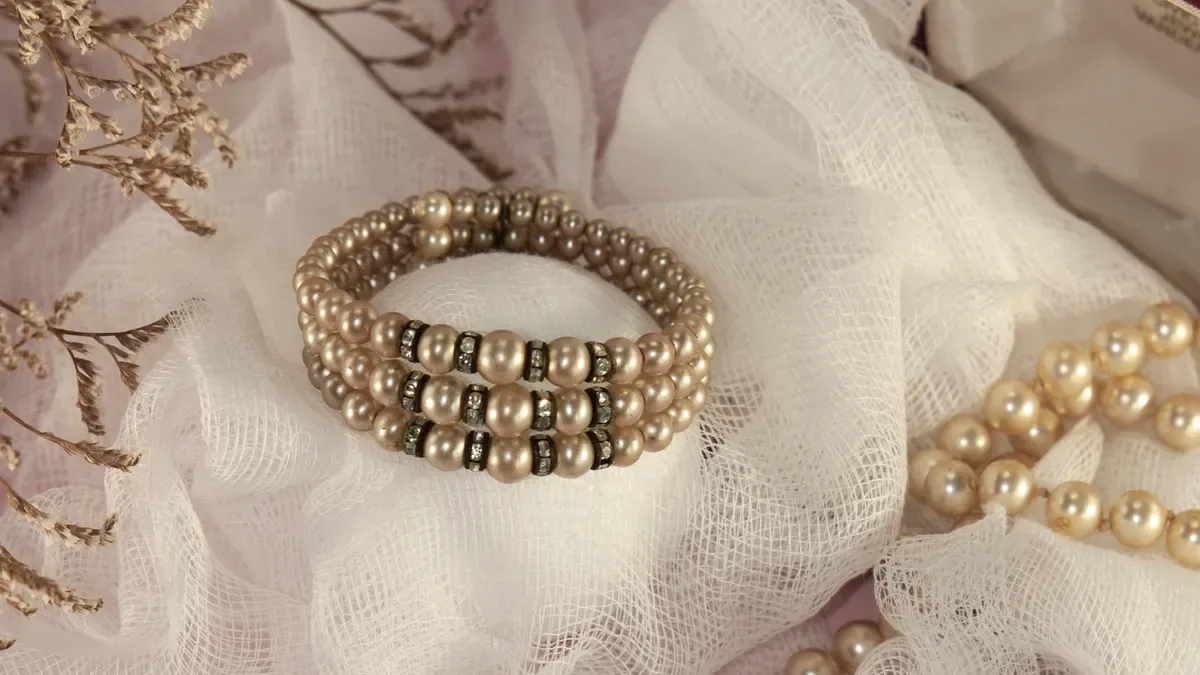
Proper storage protects every piece from tarnish and mold. The right habits keep metal bright and stones secure. A person who learns how to store jewelry to prevent tarnish safeguards their collection for years. These methods also reduce humidity inside the box.
Dry Jewelry Fully Before Storing
Why 24 Hours of Air Drying Matters
Moisture trapped against metal starts the tarnish process within hours. A full day of air drying removes every trace of dampness. The owner should lay pieces flat on a dry towel. Thick chains and hollow bangles need extra time. This step is the foundation of cleaning jewelry before storage.
Using Anti-Tarnish Cloths and Pouches
Anti-tarnish cloths absorb sulfur before it reaches the metal. A soft pouch wraps each piece after drying. These cloths work well inside jewelry boxes lined with anti-tarnish fabric. The owner should replace worn cloths every few months.
Separate Metals and Stones
Wrapping Silver in Cotton or Anti-Tarnish Cloth
Storing silver jewelry demands special care. Silver reacts quickly to moisture and oxidation. A cotton wrap or anti-tarnish cloth creates a protective barrier. The owner should wrap each piece loosely. Tight wrapping traps dampness against the surface.
Keeping Pieces From Touching Each Other
Metal-to-metal contact causes scratches and speeds tarnish. Gemstones can chip against harder stones. Compartment dividers keep every piece apart. This practice helps prevent tarnish and scratches at the same time.
Use Moisture-Control Products Inside the Box
Silica Gel, Charcoal, and Anti-Tarnish Strips
Several products fight moisture and oxidation inside a wooden box. The owner should use these anti-tarnish jewelry storage solutions together.
- Line compartments with anti-tarnish fabric or add anti-tarnish strips to absorb sulfur and moisture before they reach the metal.
- Place silica gel packets, activated charcoal, or a small baking-soda sachet inside the box to absorb humidity and lower mold risk.
- Replace these products every few months and keep them from directly touching jewelry.
- Store the box in a dry, cool, dark place such as a bedroom dresser, away from bathrooms and direct sunlight.
- Clean and dry each piece before storage to remove skin oils, sweat, and product residue.
- Separate pieces with individual bags or dividers so they never touch.
Where to Place Them Without Crowding Jewelry
Placement matters as much as product choice. A packet belongs in a corner where air moves freely. Strips fit along the lid or beneath a tray. Jewelry should never rest directly on a desiccant. Crowded compartments block airflow and trap dampness. A spacious layout supports every jewelry storage solution.
These jewelry storage tips protect both the box and its contents. A person who follows them knows how to store jewelry to prevent tarnish. The same habits store jewelry to prevent tarnish during humid months. Consistent care prevents tarnish and keeps every piece ready to wear.
Rotate and Air Out Stored Pieces
Jewelry kept in a box for months at a time collects moisture and develops tarnish. Rotation solves this problem. The owner wears each piece on a regular schedule. This habit exposes the jewelry to fresh air. It also gives the owner a chance to inspect each item. A simple rotation plan keeps every piece in good condition.
Wearing and Re-Drying Jewelry Regularly
Wearing jewelry regularly prevents tarnish from settling on metal surfaces. Skin oils create a thin barrier that slows oxidation. The owner should rotate pieces every few weeks. This schedule ensures no item sits untouched for too long. After wearing, each piece needs a thorough wipe with a soft cloth. The cloth removes sweat, lotion, and skin oils. The owner then lets the jewelry air dry for at least one hour. Only completely dry pieces return to the box. This practice teaches the owner how to store jewelry to prevent tarnish. It also shows how to store jewelry to prevent tarnish during humid months. A consistent routine helps store jewelry to prevent tarnish over many years. The same habit teaches the owner how to store jewelry to prevent tarnish on delicate chains and settings.
Checking for Early Tarnish or Dampness
Early detection stops tarnish before it spreads. The owner inspects each piece during rotation. A dull film on silver signals the start of tarnish. Dark spots on gold indicate moisture exposure. The owner should check clasps, chains, and stone settings. These areas trap dampness and develop tarnish first. A soft cloth removes light tarnish before it hardens. The owner also feels the jewelry for coolness. A cool surface means lingering moisture. That piece needs more drying time before storage. This inspection supports preventing tarnish and protects the entire collection. A careful owner knows how to store jewelry to prevent tarnish and uses jewelry storage solutions that work. The rotation habit helps store jewelry to prevent tarnish and keeps jewelry storage safe. Regular checks prevent tarnish from becoming permanent. They also help store jewelry to prevent tarnish for decades.
The single most important habit is keeping the box dry, ventilated, and at a stable humidity level between 40 and 50 percent. Small daily actions, such as storing dry jewelry and opening the lid, prevent most mold problems. A simple seasonal routine of inspecting, replacing desiccants, and re-treating the wood keeps jewelry boxes in excellent condition. Owners should act fast at the first sign of moisture, musty smells, or fuzzy spots. These habits prevent tarnish on silver, gold, and copper pieces. They prevent tarnish during humid months. They prevent tarnish across every jewelry storage compartment. They prevent tarnish for decades. A well-kept wooden jewelry box can last for decades and protect every piece of jewelry inside.
ΣΥΧΝΈΣ ΕΡΩΤΉΣΕΙΣ
How often should a person check a wooden jewelry box for mold?
A person should inspect the box every week. They check corners, linings, and hinges for fuzzy spots. A quick wipe with a dry cloth removes dust. This habit catches early mold growth before it spreads. Weekly checks take only a few minutes.
What humidity level prevents mold in a wooden jewelry box?
Indoor humidity must stay between 40 and 50 percent. This range keeps wood stable. It also stops mold spores from germinating. A small hygrometer measures the exact level. Owners should check the reading every morning.
Can silica gel packets alone stop mold growth?
Silica gel packets help control moisture inside the box. They cannot replace proper room humidity control. A person should use packets alongside a dehumidifier or air conditioner. Replace saturated packets every few months. This combination prevents mold and humidity damage.
Why does damp jewelry cause tarnish inside a box?
Damp jewelry releases moisture into the enclosed space. That moisture raises internal humidity. Metal surfaces react with water vapor and sulfur compounds. Tarnish forms quickly on silver and copper. Tarnish spreads to nearby pieces. Owners must dry every item before storage.
How does a person remove mold from a wooden jewelry box safely?
A person should wear a mask and gloves. They remove all jewelry and liners first. A cloth dampened with diluted rubbing alcohol wipes affected areas. The box then dries for 24 hours. Light sanding and a fresh wax coat restore protection.
What daily habits prevent mold in a jewelry box?
Owners should store only completely dry jewelry. They open the lid for five minutes each week. They wipe the exterior with a dry cloth. They keep damp towels away from the box. These small actions prevent most mold problems.
Does a sealed plastic bag protect a wooden jewelry box from humidity?
A sealed plastic bag traps moisture inside. The wood releases water vapor into the enclosed space. That vapor cannot escape. Mold spores germinate within weeks. A breathable cotton pillowcase offers better protection. Airflow keeps the box dry.
How does tarnish affect stored jewelry over time?
Tarnish dulls silver, gold, and copper surfaces. It forms a dark film that reduces value. Tarnish spreads from piece to piece inside a damp box. Cleaning tarnish requires special cloths and solutions. Prevention through dry storage stops tarnish before it starts.
See Also
Distinguishing High-Quality MDF From Solid Wood In Jewelry Boxes
How Fabric-Wrapped Jewelry Boxes Endure Durability In Retail Environments
Advantages Of Using FSC Certified Paper For Jewelry Boxes
Exploring The Anatomy Of A High-Quality Jewelry Box
Comparing Wooden, Plastic, And Paper Jewelry Boxes Comprehensively